|
I'm going to make a wooden box for my daughter Angela
using my bandsaw to cut it out with. The bandsaw box will be a
Christmas present and it will be my first attempt at something like
this. But I watched a video of someone that made one and thought I'd
give it a try.
Working With Wood
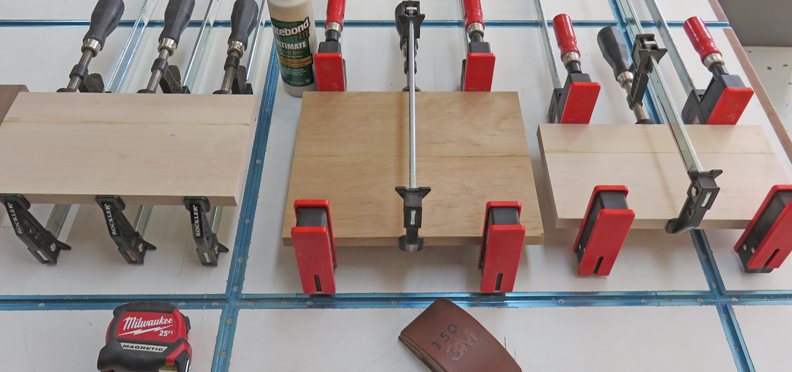
This box will be made out of alder, maple and
black walnut. What I'm doing first it gluing up some pieces that will
make up the thickness of 3 1/2" when finished.
|
|
 |
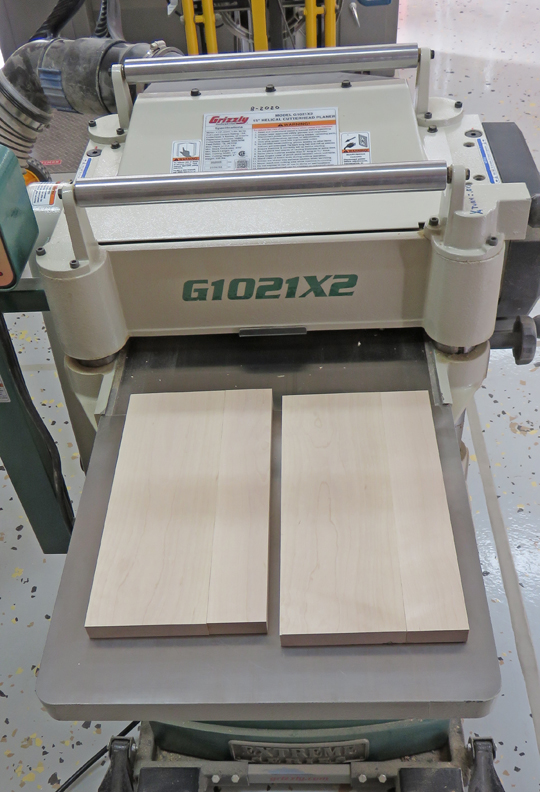
The next day I sent those pieces through
my thickness planer to just clean up both surfaces.
|
|
 |
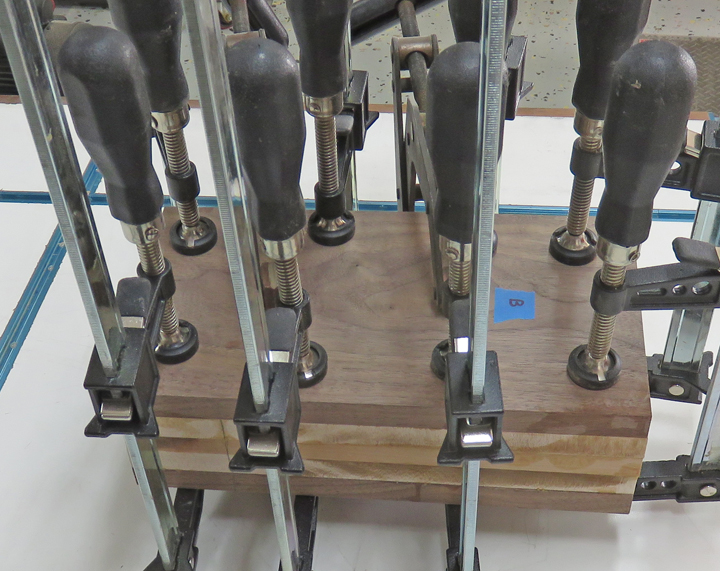
Next I glued them all together giving me a big block to work with.
|
|
 |
|
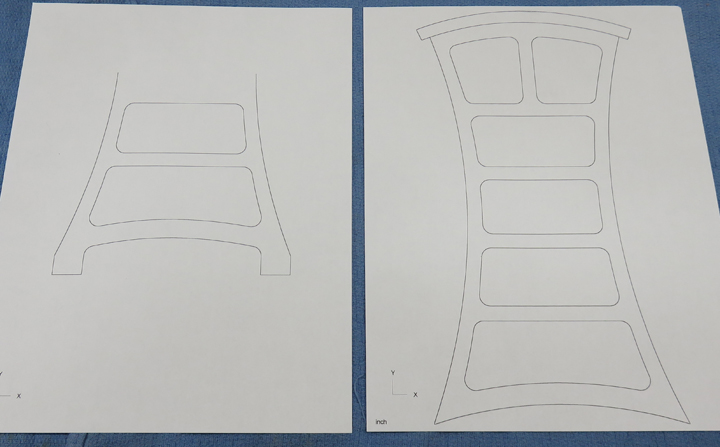
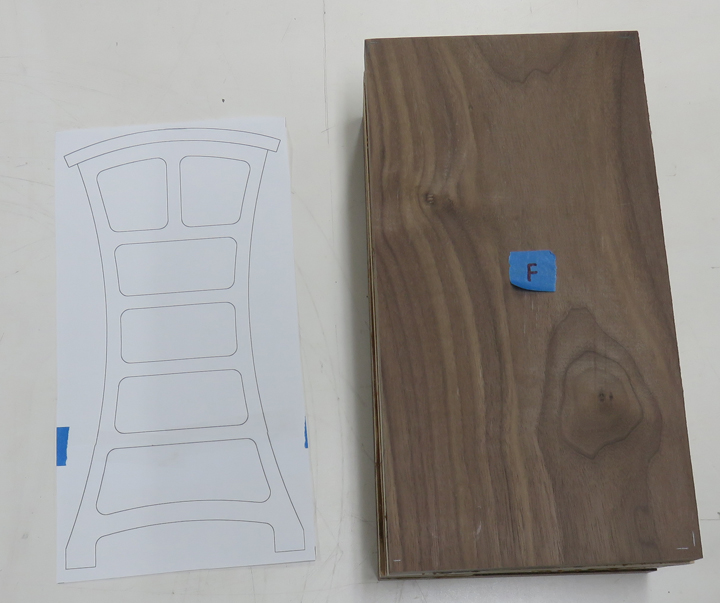
Here is the design I came up with. The picture or
template, on the
right is printed on a full sheet of paper measuring 8 1/2" X 11". I'll
glue the template to my work piece and then cut it out on my bandsaw. Now
the template on the left is going to overlay the other one, giving me the
feet that I wasn't able to print because of my paper size limitations.
|
|
 |
The length of my wood block is 12" long X 7" wide. This gives me a
little bit to work with on all sides. As you can see the paper template
has both pieces taped together making up a total length of 11
1/2".
|
|
 |
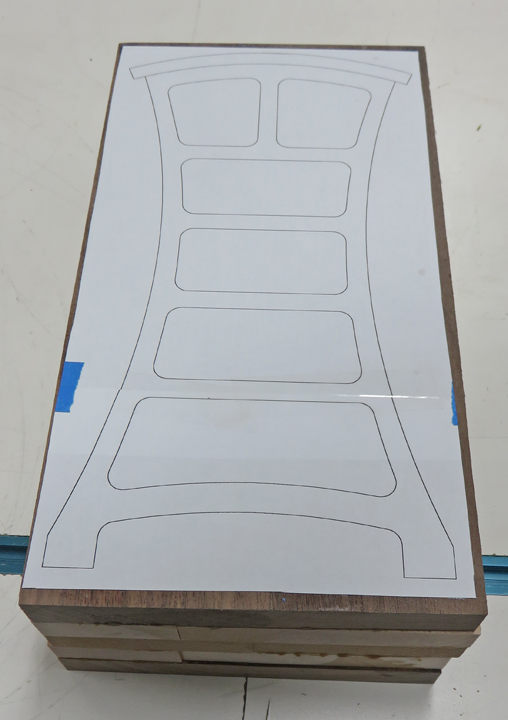
Once I spray the glue on the wood, I'll align the template to some pencil
marks that I made earlier making sure it sits where I want it.
|
|
 |
Here you can see my paper template is glued on and now I'm ready to do
some cutting.
|
|
 |
|
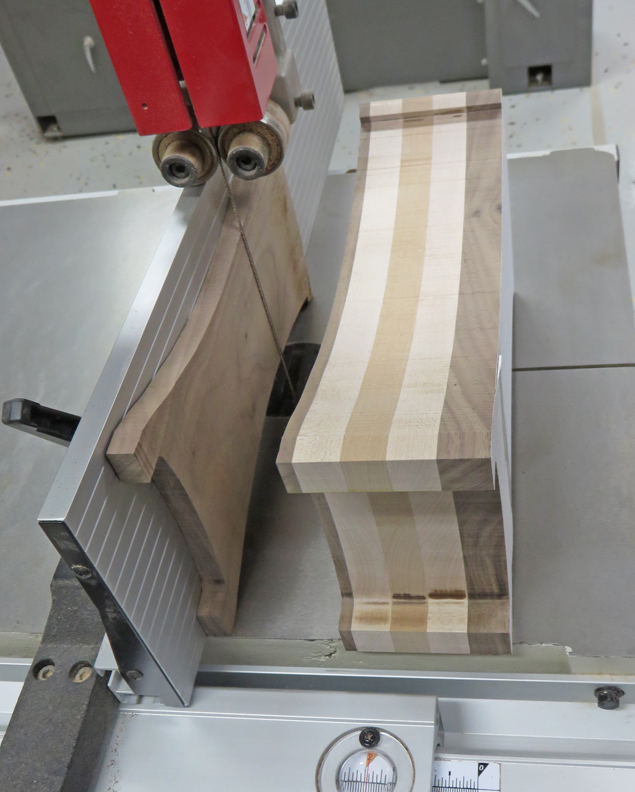
I'm using a 3/16" blade with 14 teeth per inch here.
But
after cutting for a few seconds, I knew right away that I had the wrong
blade for this particular job. With that many teeth per inch, it didn't cut freely enough
for the thickness that I had and it wanted to load-up the blade with
wood. What I needed was a blade with about four teeth per inch, which
I'll be buying before making another project like this.
|
|
 |
Now that the periphery is cut out, it was time to cut the back off. Now
there isn't a set size for this step, but I cut mine at 1/2" thick. Just
set your fence to the size that you want and then push your work piece
through it.
|
|
 |
|
This Isn't Going To Work
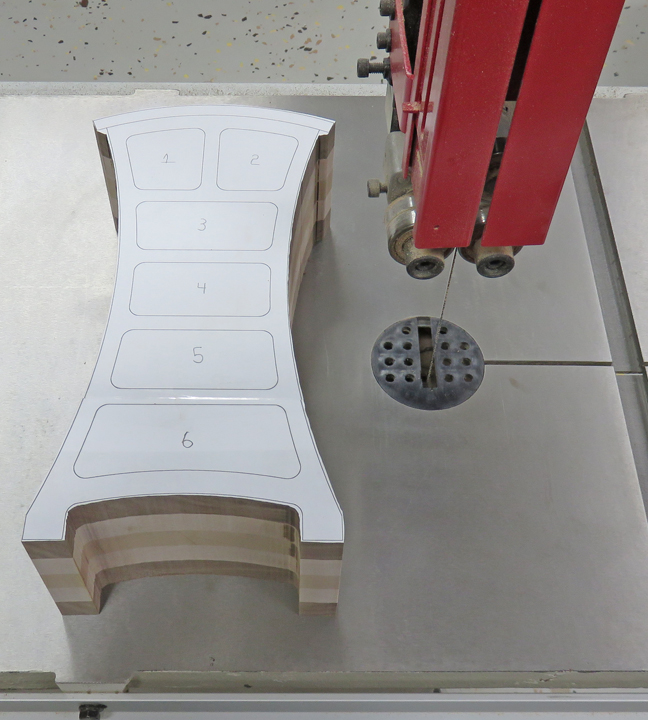
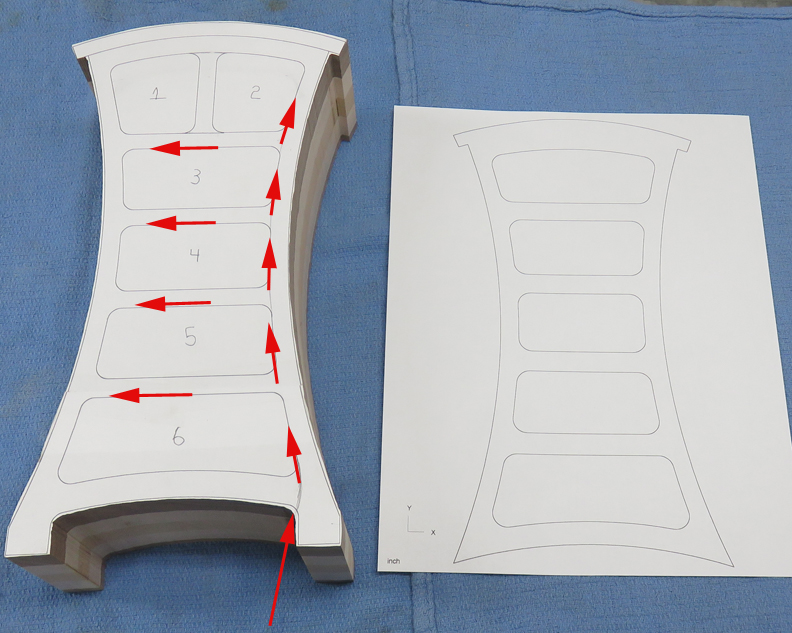
Next it was time to start cutting out the drawers but
while I was looking and thinking about this next step, I noticed that I
would be in trouble very soon. I'll explain: Look at the bottom arrow,
that will be my entry point for the saw cut. Then I
would then cut out the drawer marked with a number six. When that drawer was
cut free, I would then start cutting upwards to drawer number five until
it was cut out like the one below it, and then repeat the process all
the way to the top.
But before I cut anything I was looking at the two
smaller drawers marked one and two, and started thinking about how I was going to
cut each one out. If you look at the saw cut path, I would be fine
cutting out drawer number two. However, to cut out drawer number one
would require a cut going horizontal from drawer two over to drawer one.
And if I did that I wouldn't be able to glue that section back together
like I could with the all the other ones.
Plan B: This is where I went back in the house and
redrew my paper template that you see on the right.
|
|
 |
|
1
2
3
4 |