|
Flag Pole Topper Continued I
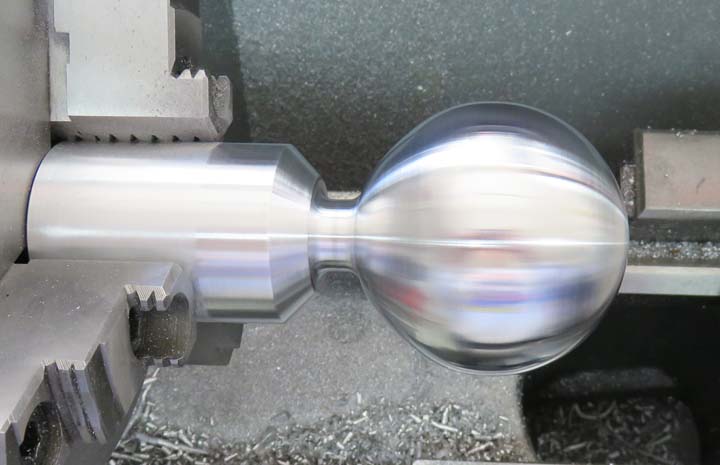
machined the one end and it's starting to look like I want. However, I
still have to do the opposite side so it becomes round. But before I do
that, I'm removing some material for two reasons: first I want to end up with
a 3/4" diameter under the sphere to help define it. And second, I need
room for my cutting tool to be able to cut the second part of this
sphere. The width of the groove is almost 1/2" with a 1/8" radius at
each end, which is what I'm doing below.
|
|
 |
|
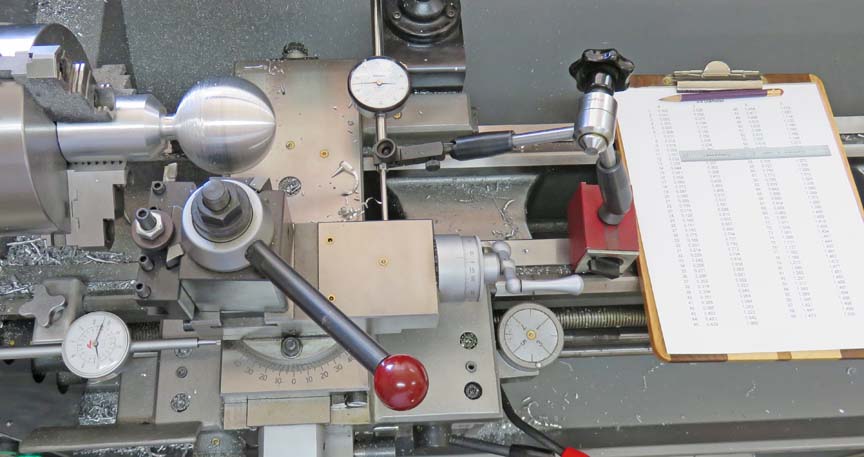
Here is my setup. By using two indicators, each having
2" of travel, I slowly created a series of steps at one degree
increments. The X and Z coordinates are on that paper to the right, all
90 of them. After I cut each step, I would move my six inch scale down
one line and then cut the next step.
I roughed this out first by staying away from the actual
dimensions three times before final cutting. First I stayed away by
.200", then .100" and last by .050". This method worked out really well
and when it came time for the final cut, things went pretty smooth.
|
|
 |
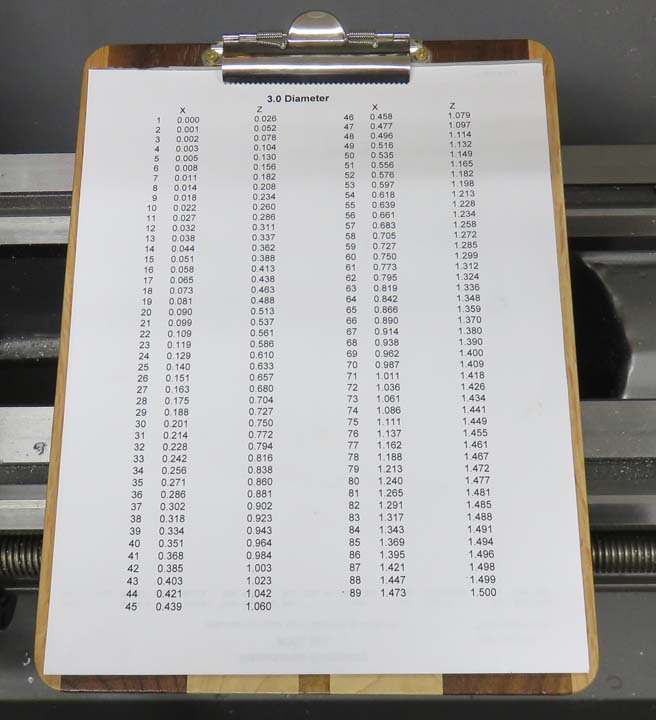
A close-up of all the numbers that I was working with. This took awhile
but I think you'll agree the end result was worth it.
|
|
 |
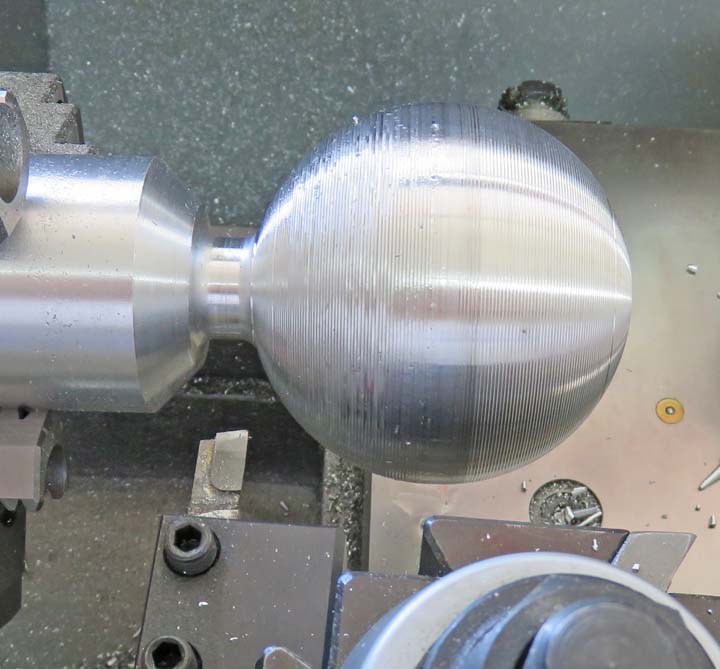
This is what I ended up with. And like I said, it's a series of steps.
Note the large 3/8" chamfer that I added as well.
|
|
 |
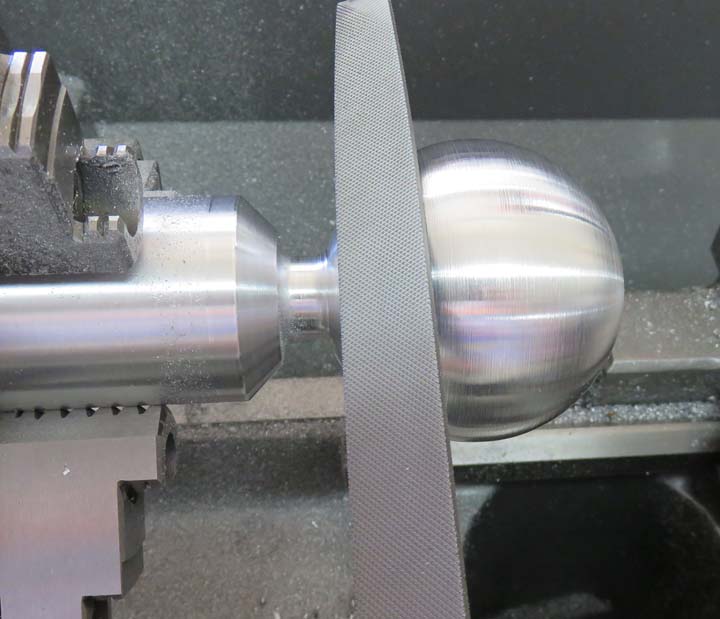
With the use of a file, I slowly worked away all the steps and ended up
with a much smoother surface.
|
|
 |
And here is what it looks like after some sanding. I know it looks out
of focus but it's not.
|
|
 |
Here I've drilled a clearance hole for a screw and I'm tapping some
1/4-20 threads in the opposite side. However, these threads don't go all
the way through.
|
|
 |
|
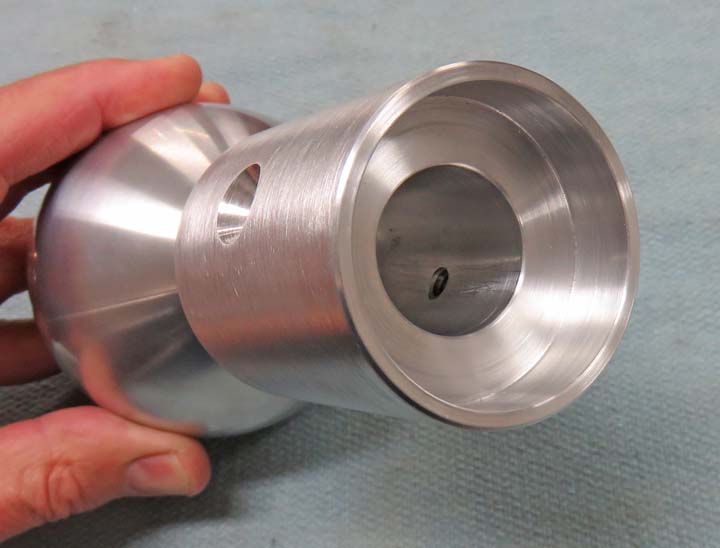
Here is what the other end looks like. The pole (larger
tube) will fit inside the larger counterbore, which is 1/2" deep. And the
smaller bore, which is 2" deep will fit over the inner steel tube and will be
held in place by a flathead screw.
|
|
 |
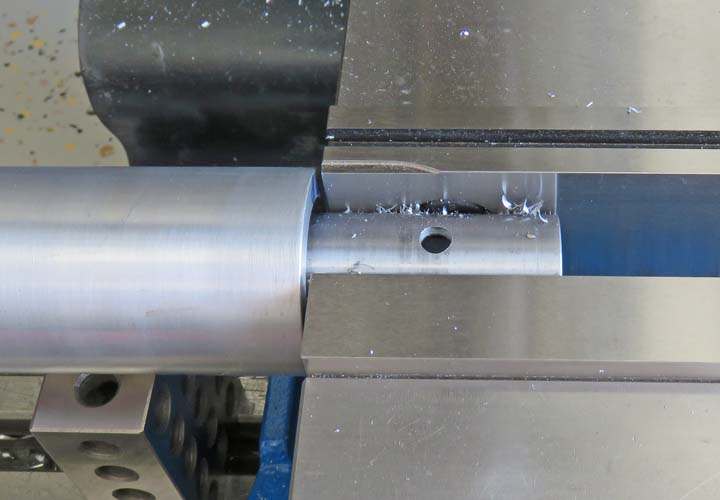
Here I'm drilling a clearance hole for the 1/4" screw in the steel tube.
Once the pole topper is in place, it will cover the end of this tube by
1/2".
|
|
|
|
1
2
3
4
5
6
7 |