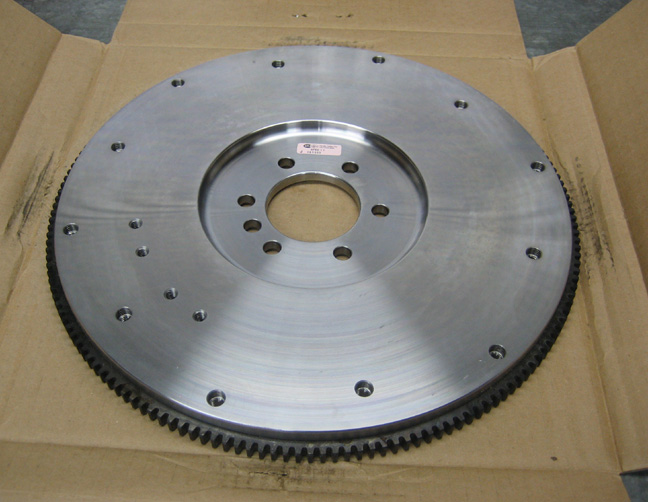
One other part came in which is my billet steel
flywheel made by McLeod. This flywheel is SFI approved and weighs 23
pounds. The clutch bolt pattern will except two different size clutch
setups and has a 168 tooth ring gear which makes it a large style. I
expected to see some rough edges here and there but it's very smooth and
looks really nice.
|
|
 |
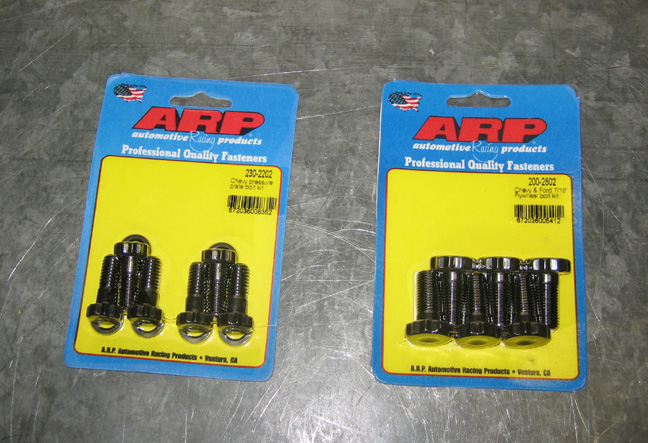
| To attach the flywheel and pressure plate I'll be using ARP
bolts. ARP makes two different styles of fasteners, the high performance
series and the premium grade pro series. The high performance series are
rated at 180,000 psi and the pro series are rated at 200,000 psi and I
bought the pro series. They're a few dollars more but I believe it's
money well spent. After putting some ARP assembly lube on the threads
and under the heads of the bolts, I'm ready to torque them to 85 pounds.
Once I was under the car and was placing the flywheel on the crank,
it wouldn't fit. I tried a few times thinking it was me but after
measuring the crank flange O.D. and the flywheel I.D. there was .002 of
an inch difference. And sure enough I told myself that this would only
be a few minute job. What the hell!! I have no idea why it won't fit
because the old flywheel/flexplate worked just fine so I would think the
new flywheel is the problem. I've got two choices here....call to find
out what's going on and possibly send it back (which would take awhile
I'm sure) or take to my work and fix it myself.
|
|
 |
|
Update: Monday, Jan, 30th. I called McLeod
this morning and asked them about my flywheel dilemma. They told me that
the size difference between the crank and flywheel is normal and has
been machined to have a .002" press fit. I told them it would be nice if
they put that info inside the box so a guy knew what was going on. He
didn't sound like it was a big deal but I think people would like to
know that. He also mentioned that I could heat it to 400 degrees in the
kitchen oven and that would make it easier to install. But I'm not going
to use my oven for something like that. Anyways, it looks like McLeod is
off the hook as far as quality control goes but it sure would be nice to
have some paperwork in the box telling me this in the first place.
Jan, 31st.
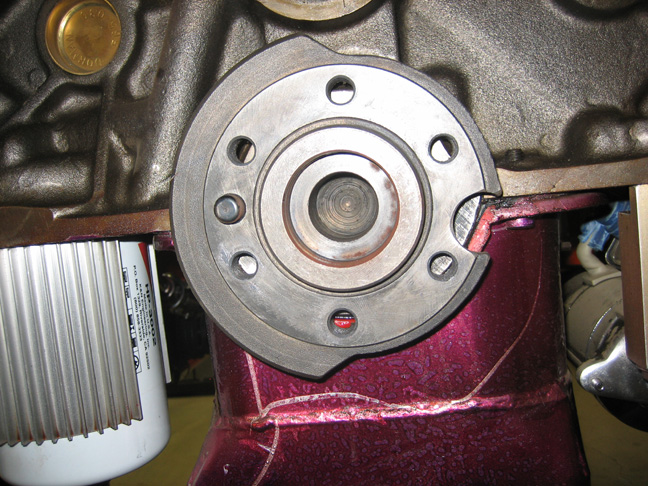
While I was still waiting for my trans to be shipped and with my new
knowledge on how to install the McLeod flywheel, I figured that I'd bolt
it on. I made sure that the crankshaft flange was nice and clean and I
also used an India stone on the surface to make sure it had no burrs.
|
|
 |
I'm using two longer bolts to get the flywheel into place and to keep it
from falling. Then one-by-one I used the ARP bolts but not before
putting some ARP assembly lube on the threads and under the bolt heads.
If you don't use any lube to install fasteners that require a specific
torque value, your torque numbers won't be correct. Using motor oil was
the old standard for years in place of assembly lube but that doesn't
guarantee consistency like a good assembly lube will.
|
|
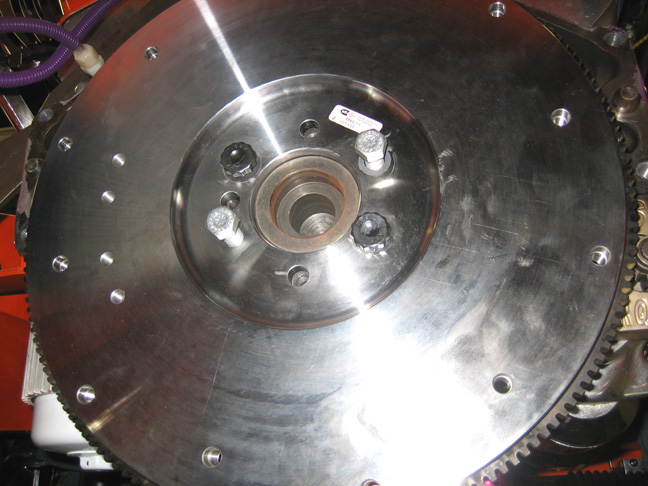 |
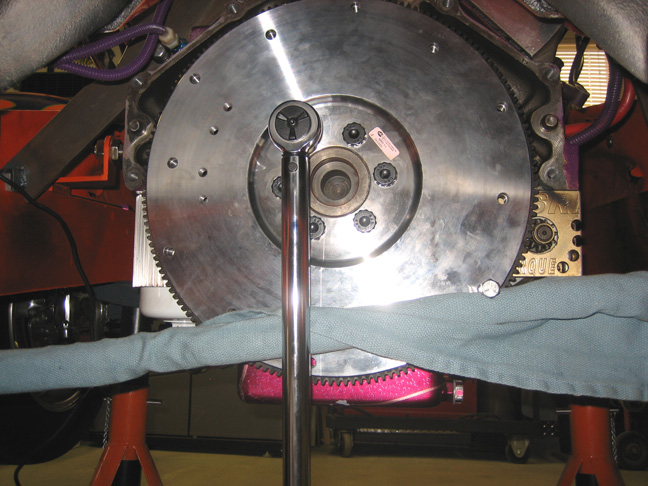
What I did to install this is to start the bolts and then slowly tighten
them down in a criss-cross pattern drawing in the flywheel towards the
crank until it bottomed out. What you also see here is a long pry-bar
wrapped with a towel (so it doesn't damage the nice surface) that was
placed between two bolts so the flywheel wouldn't turn. Using one hand
to hold the bar and the other on the wrench, I torqued them to 60 lbs.
first and then 85 lbs. like the ARP instructions said. Now 85 pounds
seemed like a bit to much for a 7/16-20 bolt and it normally would be,
but the ARP 200 series fasteners are made out of premium material which
is why you can get away with that kind of torque.
|
|
|
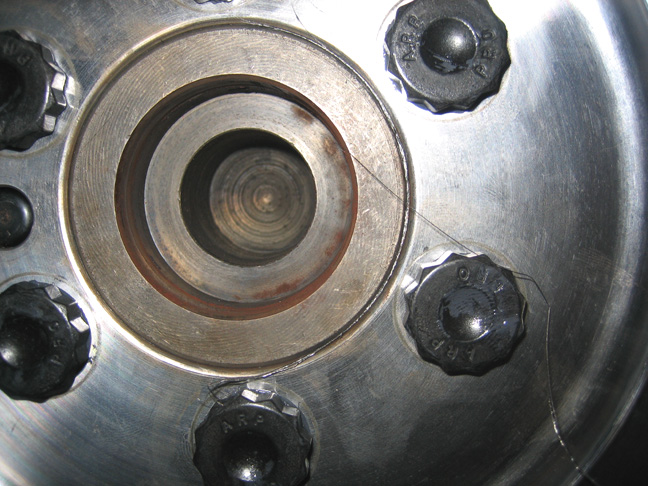
As I was pressing the flywheel on I figured there would be some metal
removal because of the .002 press-fit. If you look close you can see a
stand of steel that resembles a hair that was shaved from the inside
diameter (I. D.) of the flywheel after it was torqued down. This is
pretty normal with an interference fit as the material has to go
somewhere and in this case metal was cut (because of the heavy wall
thickness). Now if you had the same size I.D. but a much thinner wall
thickness... say 1/4" inch or less, then the material wouldn't shave off
like this but would expand instead. In other words if you measured the
outside diameter (O.D.) of the thin ring before and after pressing it
on, you would notice the O.D. would be larger afterwards. This won't be
the case with a huge wall thickness like a flywheel has (about six
inches in this case) because it won't let it expand. This is why you get
the metal removal like you see below. To remove those metal shavings all
I did was pull on the pieces that was sticking out and they peeled off with
no problem.
|
|
|
|
1
2
3
4
5
6
7
8
9
10
11
12
13
14
15
16
17
18
19
20
21
22
23
24
25
26
27
28
|
|
29
30
31
32
33
34
35
36
37
38
39
40
41
42
43
44
45
46
47
48
49
50
51
52
53 |
|
54
55
56
57
58
59
60
61
62
63 |