|
I've been using my old Mr. Gasket shifter stick up to this point which
has worked pretty good so far but there are some things I'd like
different so I decided to make one. The first thing that I'd like to
change is the threaded end because it's the wrong size for my shifter ball.
The Mr. Gasket has 1/2-13 threads and I need 1/2-20 to be able to use my
old one. The second thing is to have the shifter a little closer to me
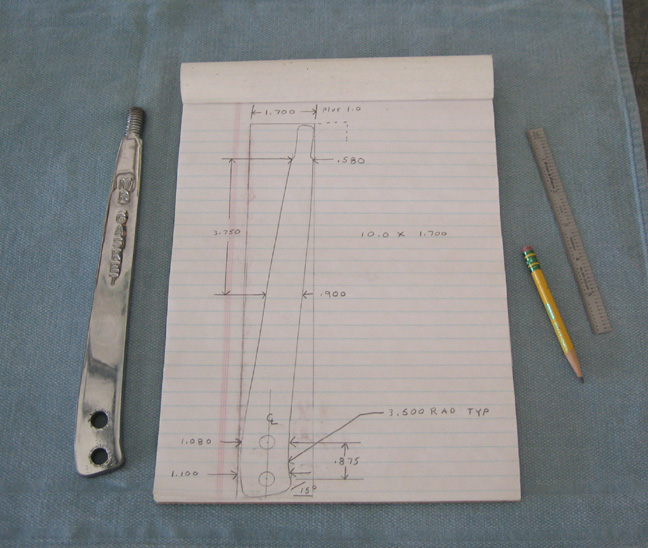
by about one inch. If you look at the sketch below you can see I made a
note to add an extra inch to the new one. This should make it exactly
where I would like it once it's installed. On the other hand, the height
is just about right so I won't be doing much to that dimension.
The Mr. Gasket shifter has the threads built into the end of
the stick but I won't be doing that. The new one will have 3/8-16
threads tapped into the end of it and then I'll use a stud with two
different threads on it to go between the shifter ball and stick. The
reason I'm doing this is because the new stick will be made out of
aluminum and this will give me more wall thickness which will add
strength.
|
|
|
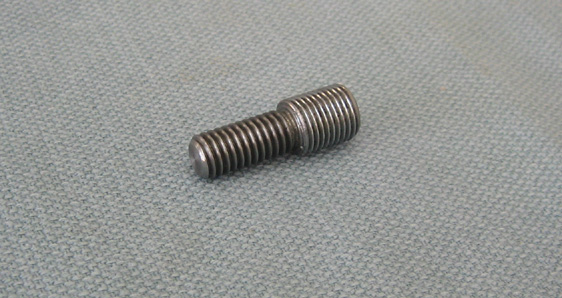
Here is the stud that has two different thread sizes that will adapt my
shifter ball to the shifter. With repeated use of pushing and pulling in
that area I had a feeling that it might crack. Having a 3/8" thread size
gives me much more material between the outside of the stick and the threaded area.
|
|
|
|
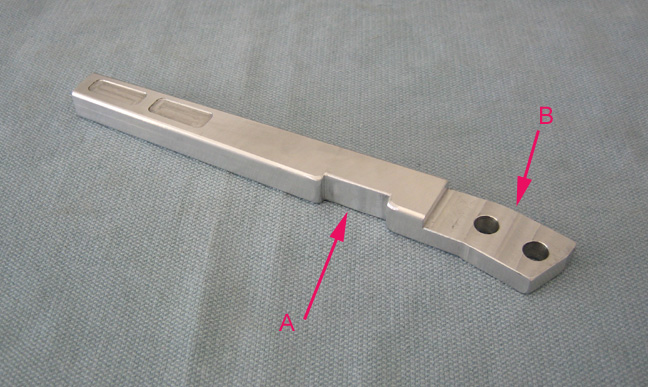
Here is the new shifter stick which isn't much to look at but I think
will work good. The first thing you might wonder about is notch 'A'.
This wasn't planned but was necessary to clear the hole in the console.
Here's what I mean, the Mr. Gasket shifter was used as my mockup and
once I had it cut down shorter with some new holes drilled in it, I
liked how it felt and it worked pretty good. I gave the rectangular hole
in the console a little extra room for this shifter and things worked
fine. But when I made the new one with the extra "inch" of material
added on, that changed everything and it hit the console when I put it
in 2nd, 4th and reverse. This was an oversight on my part. With the
boot adding to the problem and with the stick in a different position
now, I had to add this notch so it would clear the console. It was a
minor setback and a second trip back to my work but it clears now and
you won't see it because the boot will cover it.
The other notch 'B' was also part of the second trip and was to place
the stick closer to the center of the console. With this new stick being
made out of aluminum I added some material here and there so it would be
stronger because the old one was made out of steel. The thickness of the
old one was about .375" and the new one is about .600" which put it off
center compared to the thinner one. I cut the notch .250" deep which
puts it right where it should be and now it looks much better.
The two small recess's at the top are for looks only because I didn't
know what to do here. I didn't have a CNC machine to work on this time
because they all had jobs on them so I made this on a manual machine
(Bridgeport style milling machine). The recess is 1.25" long X .200"
from the edges along the tapered length X .025" deep. I'm going to give
the recessed areas a brushed finish and then polish the material around
it. I don't know how it's going to look but that's the plan.
|
|
|
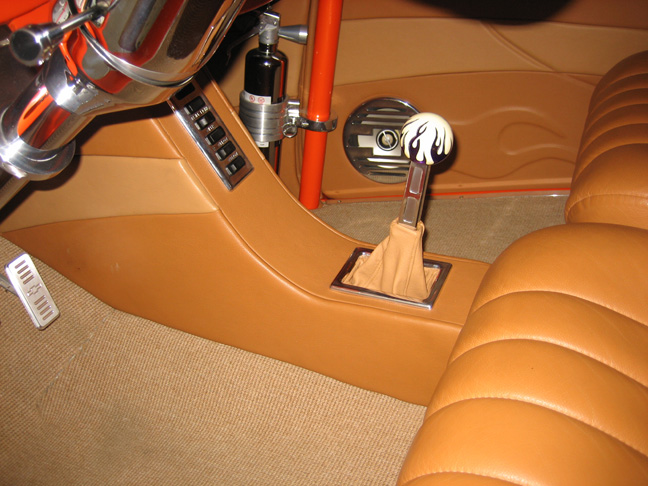
Here is the shifter installed and ready to go. The boot fits and looks
pretty good so I'm very happy with it but it didn't start out that way.
I found that if the boot was stretched out towards the top of the stick
that it didn't allow for enough movement. What I ended up doing was
pulling the boot down a small amount and then tucked the loose material
down around the opening. This worked out nicely and I like how it looks
now but I didn't plan it like that. Once I found where the boot worked
the best, I marked the top of it on the stick and then cut the recess's.
|
|
|
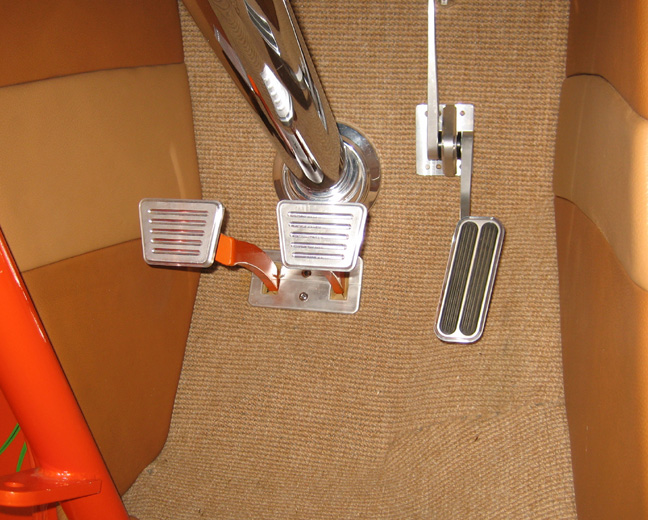
Another area that I've been working on is my pedals. As you know from a
previous update I made my clutch and brake pedal pads. They work pretty
good but I've been wanting the throttle pedal to match the others so I
thought it was time to do just that so with a sketch and an idea it was
time to make a matching pedal.
|
|
 |
|
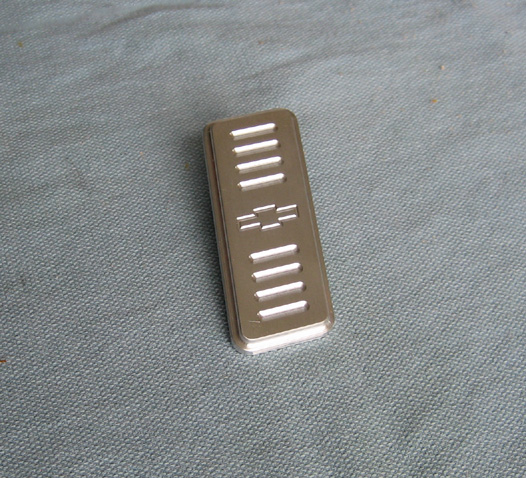
Here is what I came up with for my throttle pedal. It's
made out of aluminum and has the same pattern as the others...with a
little something extra in the middle.
|
|
 |
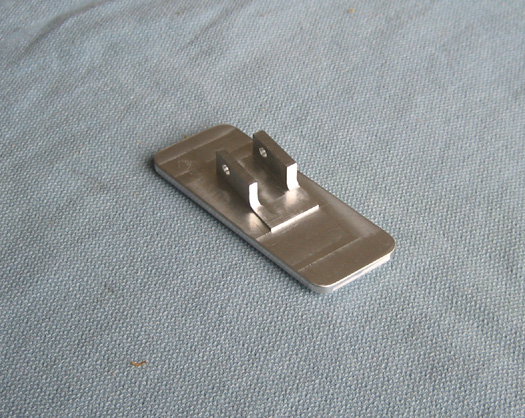
The back had more work than I first thought it would and if you look close
you'll notice that the mounting lugs sit at a ten degree angle. This angle
was necessary so it would look right once it was installed next to my
brake pedal.
|
|
 |
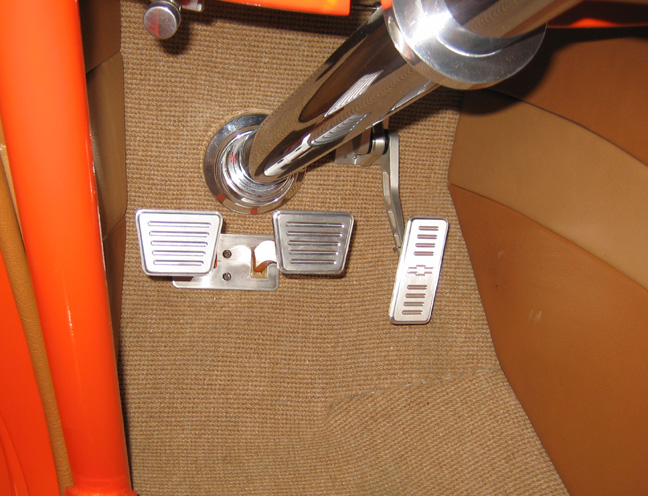
Now that all the pedals match I'm pretty happy with them. And you can see
what I mean about the throttle pedal sitting at an angle as it matches the others
a little better this way. Yes I could have made it so it would've sat
vertical (and it would have been easier to make) but I thought it would
look better this way.
|
|
 |
|
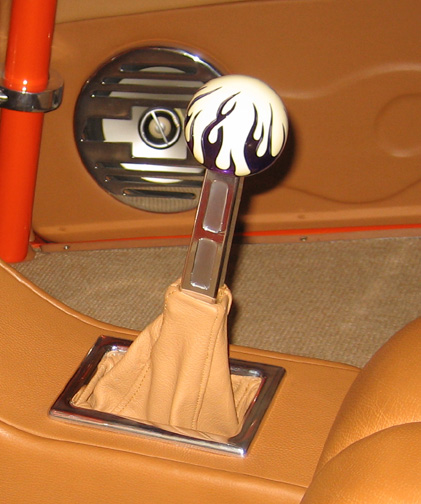
Switching gears one more time (no pun intended...) here is a close-up of
the stick to show the brushed and polished finishes a little better. The
shifter feels like it's placed just right now and should be easier to
drive too.
Oh...and if you were wondering how much weight difference there was
between the 4L80E automatic and the new Tremec five speed, the car
weighs one hundred pounds lighter now. This was something I had been
wondering ever since I've had the idea of switching them. Even with the
1/4" thick scatter shield, billet flywheel, twin-disc clutch setup and a
longer driveshaft it's lighter. So what does it weight? 2800 lbs. to be
exact which is good news. I may take it back to the
dyno to see what kind of
difference there might be in the near future because the numbers should
be better so stay tuned for that one!
I can't wait to take it for a drive to see how the new stick feels
compared to the old one. But before I can rip any gears I'll need to
drive the recommended 500 miles that the trans and clutch manufactures
say to do. That means I've got about 250 miles more to go so I hope I
can hold out that long :-] One of the last things that needs to
be done is my emergency brake so look for that in the near future.
|
|
|
|
1
2
3
4
5
6
7
8
9
10
11
12
13
14
15
16
17
18
19
20
21
22
23
24
25
26
27
28
|
|
29
30
31
32
33
34
35
36
37
38
39
40
41
42
43
44
45
46
47
48
49
50
51
52
53 |
|
54
55
56
57
58
59
60
61
62
63 |